

Answer: A VESA pattern refers to the configuration of the four mounting holes on the back of a TV or monitor. For example, a 100 x 100mm VESA pattern has the mounting holes 100mm apart, arranged in a square. Before you select a mount, check the VESA mounting holes on the back of your display and measure the distance between the holes (center to center) to verify the VESA configuration. The specifications should also be in your owner's manual. Many mounts accommodate a variety of patterns, but make sure that the mount you choose fits the equipment you have or plan to purchase.
Answer: Locate the four mounting holes on the back of your TV or monitor. They will be in either a square or rectangular configuration. Measure the distance between the holes(center to center). The most common and standard VESA patterns vary in 100mm increments, roughly equivalent to 4 inches. The distance may be close to 4 inches, 8 inches, or 16 inches apart. VESA patterns are listed with the horizontal distance first, followed by the vertical distance. For example, holes that are 8” by 4” apart would be categorized as a 400 x 200mm VESA pattern.
Answer: For the longer bolt provided, add washers or spacers to fill the extra space between the TV and the TV bracket. We recommend thread engagement by at least 5 turns.


Answer: First plug in the cables, then add the spacers to create extra space between the TV and the TV brackets.

Answer A: If you have a full-motion mount with leveling adjustment, use this adjustment to level the TV (otherwise, see Answers B and C below). Slightly loosen the leveling bolts, level the TV, and then retighten the bolts to hold the TV in position. Choose the leveling adjustment method a, b, or c below that fits your TV Wall Mount.

Caution: When making this adjustment, please note that these bolts also hold your TV on the mount. Don’t overloosen the bolts as the TV could drop off the mount. When the TV is level, retighten (but don’t overtighten) the bolts.

Answer B: Make sure the TV bracket bolt holes used are at the same level. Move both TV brackets upward to reduce the gap between the holes and bolts; then tighten the bolts.

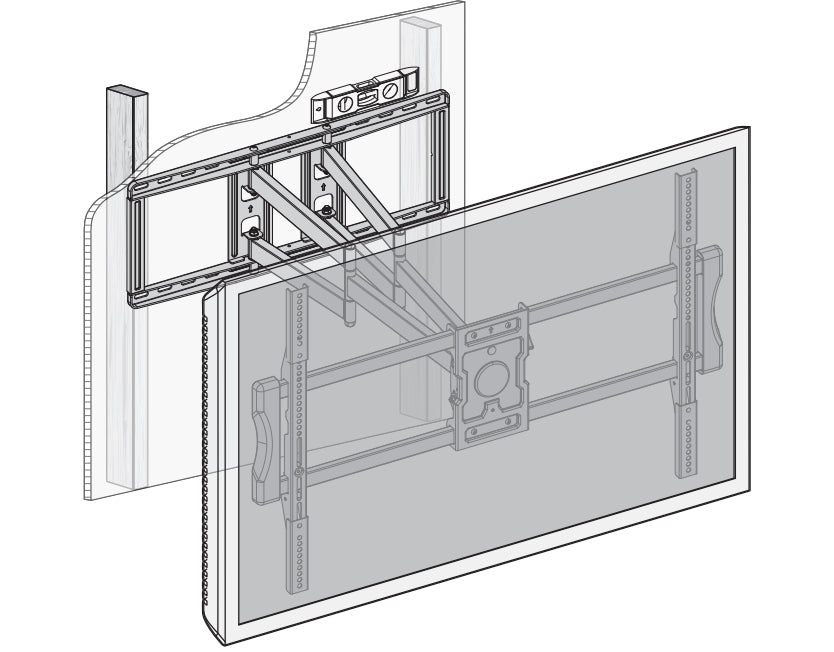
Answer C: Check if the wall plate is level using a bubble level. If the wall plate isn’t level, adjust it to level
Answer A: If you haven’t yet mounted the TV on the TV Wall Mount, do that before moving the arm assembly. It’s easier to move the TV Wall Mount by holding and moving the TV.

Answer B: Use the Allen wrench (provided) to slightly loosen the bolts on the joints of the arm. This method may not be suitable for some models.
Answer C:If you have tried Answers A and B but adjustment is still too hard, try lubricating the arm joints with a few drops of machine oil.

Answer: Our wall mounts are made of heavy-duty steel that has been powder-coated for strength and durability. However, over time, the elements (such as wind, dust, and moisture) can penetrate the protective layer and cause rust and other damage to the material and joints. Since our primary concern is security for your equipment and safety for your family, we must caution against outdoor installation where exposure to natural elements can deteriorate the product.
Answer: The best height for your TV depends on a variety of factors including furniture, size of room, and viewing preferences. The simplest method is to position the TV so that the center is the same height as your eye level. If you watch TV most often while sitting down, centering your TV about 42 inches above the ground should work well. However, if your TV is extremely large, or you have a seating area with high-top bar stools, you may want to mount the TV higher. Whatever height you choose, try to make sure that the bottom of the TV is still close to eye level when seated. If TVs are mounted too high, craning your neck to look up can lead to neck and back discomfort or eye strain when watching for long periods of time.


